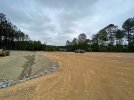
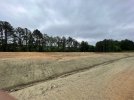
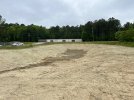
• Thank you for visiting HeavyEquipmentForums.com! Our objective is to provide industry professionals a place to gather to exchange questions, answers and ideas. We welcome you to register using the "Register" icon at the top of the page. We'd appreciate any help you can offer in spreading the word of our new site. The more members that join, the bigger resource for all to enjoy. Thank you!

A few projects I have done recently

CM1995

Administrator
Joined
Jan 21, 2007
Messages
13,350
Location
Alabama
Occupation
Running what I brung and taking what I win
Back at the mudpit.

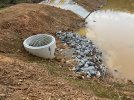
Shot of the headwall set, fabric out and 1-2' of 57's. It was fun pulling the fabric over the muck since you could only stand on the edges and place it like a bed sheet.
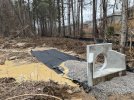
IMG_4413.jpeg

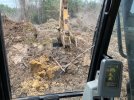
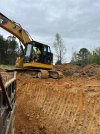
Muck, muck and more muck. 321DL with 8K hours still earning. No DPF, no DEF. I'll rebuild this machine as needed and the youngsters can fight over it at my estate sale. :)
IMG_4447.jpeg

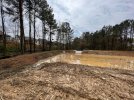
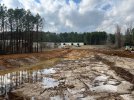
Pond roughed in. The logs and wisteria we used as mats were all mashed and left in place.
IMG_4461 (1).jpeg

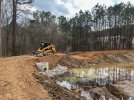
Grouting the outlet structure and pond overflow cut out. The galvanized trash rack is in front of the 279 ready to be red-headed in on top of the OCS.
IMG_4460.jpeg
 
Last edited:
CM1995

Administrator
Joined
Jan 21, 2007
Messages
13,350
Location
Alabama
Occupation
Running what I brung and taking what I win
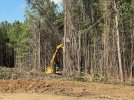
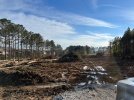
Once the pond was roughed in we started clearing the rest of the lot. Most was very tall, thin pine second growth which was easy to take down and aggravating to clean up.

IMG_4458.jpeg

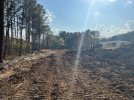
Lower part of the property cleared and the drainage swale being roughed in to the retention pond. Muck, muck and more muck. Rinse and repeat.

IMG_4472.jpeg

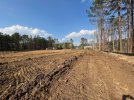
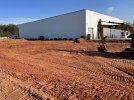
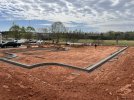
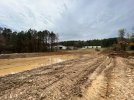
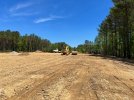
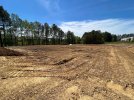
Pic towards the north on the lower side of the lot. Building pad stripped of the 1-2' of topsoil and silt sub-soil.

IMG_4473.jpeg

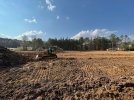
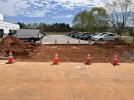
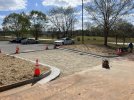
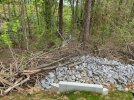
Edge of the parking lot towards the retention pond. Again 1-2' of topsoil and silt strip to get down to something that's 1/2 way decent material to fill on. Brush pile in the foreground.

IMG_4474 (1).jpeg
 

CM1995

Administrator
Joined
Jan 21, 2007
Messages
13,350
Location
Alabama
Occupation
Running what I brung and taking what I win
This pic is out of sequence time wise but shows the north end of the project.

IMG_4491.jpeg

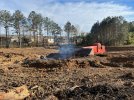
Rented an air burner from a local road building contractor. The trees were so wet being in this soggy bottom when you squeezed them between the bucket and thumb water would shoot out the ends. Made a fun time burning..

Pine straw rolls from HD soaked in diesel fuel work pretty well. ;)

IMG_4493.jpeg

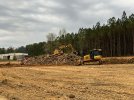
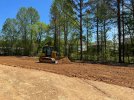
Building pad and parking lot stripping. 325FL processing the brush for burning. We had to break the brush up, turn it and flip it in order to get some drying from the few days of sunshine we had.

IMG_4479.jpeg
 

CM1995

Administrator
Joined
Jan 21, 2007
Messages
13,350
Location
Alabama
Occupation
Running what I brung and taking what I win
How well did the air curtain burner work?

How deep was the pit (below grade) and how much debris was left after using it?

It worked well after the fire was hot. This one was of the smaller Concept products units. Owned an Airburner T400 in the mid 2000's that I think is a better burner but this one fit the bill. Back in 2014 I rented a McPherson burner from the guys down in Tifton. Those units work well except the manifold doesn't fold out it requires a trackhoe to take it off and attach.

Pit was 10' wide and 6" (each side) less than the length of the manifold. We were trying to go 10 deep but hit ground water (shocker!). Pit ended up being 8' deep or so and we stacked our largest logs in the bottom then lit the fire on top of those. Had to do that several times after some large rains that soaked the pit.

This units manifold sits up off the ground so you have to make a berm around the pit for proper airflow. The berm serves 3 purposes - proper airflow, diverts ground water around the pit and somewhat for safety. So with the berm we were close to the desired 10' depth.

There is no real debris left other than ash and some charcoal. If the wood would've been dry there would've been very little ash and nothing else. We were very mindful of smoke and didn't start burning until after 7:45 and stopped around 3:30. Had a burn permit from the city FD and luckily we didn't get any complaints.
 

savman

Well-Known Member
Joined
Jul 11, 2018
Messages
51
Location
LaGrange, GA
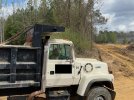
Took the leap and got TBC...I was reluctant to buy it (actually had a trial); man was I wrong there.

Got a chance to do a job on short notice. All I had to work from was a 2d .pdf of the shape of the proposed parking lot and 'we want it here'; there were some constraints as well (more on that later).

Monday I called my salesman and my tech support guy at SiTech; explained what I wanted to do. (had previously discussed some of this when I bought my base/rover) They assured me I could do what I wanted. Went out a took a topo and located some of the major features (aforementioned contraints; mostly related to fire protection; also EOP, future building expansion, dicthes, trees, etc.) Set up my first TBC training session for Wed and Thurs afternoon.

Job figured to a little over 1500 yards cut and 200 and change fill. Cut the first blade of grass Saturday am. Loaded with the 321d; cut grade, pushed off, and bladed haul road with my D3; had a tandem and single axle dump truck.

img1.jpg

Dirt was moved, cut and fill, by Sunday afternoon. Could have poured curb Monday, but I had no idea we would be ready that fast and had my finishers on standby for mid week. Layed out all curb including radius points with my rover. Got them in there Wed; out on Thurs. Little over 600 feet.

IMG-0705.jpgIMG-0706.jpg
Had to lower two irrigation and an electrical line on this little parking lot connection.

After curb was in I cut sub grade and finsihed backfilling by lunch on Friday. Also did additional work on Tuesday repair a prior contractors mess in the back b/c they were so impressed with our quality and speed.

So 7 days from start to finish. Could have put the base in (we put in enough to safe parking connection and create entrance to larger lot) if that was in my scope; but alas it wasn't and we got 8" over the weekend. Job held up, but could have been perfect.

Could have been done in 5 days if I knew we could do it that fast.

IMG-0728.jpg
 
Last edited:
savman

Well-Known Member
Joined
Jul 11, 2018
Messages
51
Location
LaGrange, GA
Finished pics

IMG-0724.jpgIMG-0726.jpg
I do a fair amount of work like this.

After I got the topo and features loaded into TBC we couldn't build the parking lot exactly like they wanted. Had to move a parking space from one side to the other to shift the entrance up the hill some to get in between the fire hydrant and meters/valve.

No engineer to consult and wait on; few clicks of the mouse and I had it modified in TBC. No guesswork on site.....I'm not sure if I would have caught it right off the bat had I been doing things the old way. This way, I caught everything before we even cut a blade of grass.

And I don't even know what I am doing; lol.

Also decided to tweak the grades a little after rough grade. Did it on my own Sunday night and had my trainer look over it Monday. Pushed the changes to my machine Monday a.m. and bam it was reality.

Didn't have radius points so stumbled through how to add circles to each radius at 5 am Wed morning; got on-site, pused my new points to my file, used Cogo functions on my data collector to find the center of each circle and 10 minutes later I had my radius points staked.

I'm sure there's a better way, but I did it on my own and didn't even have to wait for anybody to pick up the phone. I control my schedule.

I will never go back to the old way.

TBC is a learning curve, and I have a long way to go but for me it's worth every penny. I hate....I mean absolutely hate waiting on other people. No surveyor, no model builder needed.
 

savman

Well-Known Member
Joined
Jul 11, 2018
Messages
51
Location
LaGrange, GA
One more thing I'll add; It rained Friday before we started and rained (like hell) Saturday after we finished. I don't have to tell you CM, but it's been about working in windows to get jobs done with this weather we've had.

I was blading grass off when we started and had to pull a couple trucks Sat am; but it was all worth it to start and finish the job in a weather window. You know how something can drag on once it rains and you have to wait for everything to clear up.

I didn't do it myself, everyone did their part; including my customer and my employees/subs; but man it sure made it easier to have as much as possible under my control.
 

CM1995

Administrator
Joined
Jan 21, 2007
Messages
13,350
Location
Alabama
Occupation
Running what I brung and taking what I win
Nice work Savman!

Talked to Mike last week about outfitting a 325 next gen and he told me you jumped into TBC. From the looks of it you took the ball and ran with it!
 
Last edited:
CM1995

Administrator
Joined
Jan 21, 2007
Messages
13,350
Location
Alabama
Occupation
Running what I brung and taking what I win
Back in the swamp.

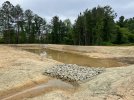
3/4 of the pond finishing up. Emergency overflow poured and outlet structure installed with galvanized trash rack.

IMG_4595.jpeg

Shot of the upper portion of the pond. This was one of the most difficult retention ponds we've ever done due to the poor soils and record rain amounts.

IMG_4596.jpeg

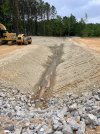
Closer shot of the outlet structure. Rip-rap check is doing it's job for the most part. This pond maintains 3-6" water in the bottom due to all the ground water flowing into it. Threw a little grass seed around for temp cover. The hydroseed truck is coming next week to spray everything.

IMG_4626.jpeg

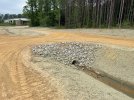
Outlet headwall. The brush check dam will stay in place.

IMG_4627.jpeg
 

CM1995

Administrator
Joined
Jan 21, 2007
Messages
13,350
Location
Alabama
Occupation
Running what I brung and taking what I win
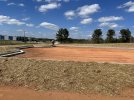
Muck disposal area pic taken from the edge of the retention pond. The 321 and 533 are parked on the edge of the future parking lot. Where they are parked is 3-4 of structural fill and right behind is 3-4 of pudding.

5CD92884-EE5E-497C-BF80-E7F83EF4FB96.jpeg

Pic back towards the pond across the muck disposal area.

2BF1D7B0-74C7-434A-8544-AFC3BFDFCBCF.jpeg

D3 earning its keep. That little dozer is quite impressive for its size and what it can do.

29B8AF68-2BFB-453B-AB65-A4A5AC1586A5.jpeg

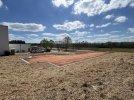
Building pad to subgrade. The inspector showed as she always does to give it a once over..:D

IMG_4621.jpeg
 

CM1995

Administrator
Joined
Jan 21, 2007
Messages
13,350
Location
Alabama
Occupation
Running what I brung and taking what I win
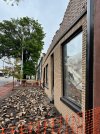
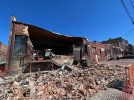
This is some of the weird phone calls I get from some of the GC's we've worked for years with. Monday morning 6:45 I get these pics and ask if I can meet them on site to give any ideas on how to tackle it. After rearranging a typical Monday morning schedule I was able to be on site at 10:00 AM.

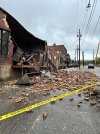
Problem - Last Saturday we experienced several inches of rain over a 24 hour period. This building is downtown and over 100 years old. The roof has a break in it where 30% of the roof drains to the front and 70% drains to the rear.

Apparently the front scuppers and gutters were clogged up and it was just too much water for the roof structure to hold it.

The roof is SYP 2x8's resting on large metal truss girders supported by brick pilasters in the structural clay side walls. The water was just too heavy for the connection of the roof to the front wall.

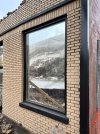
What kept the wall from completely collapsing is a C-channel the GC added a couple a years ago on the inside of the wall.

IMG_4489.jpeg

Apparently from the staining on the rubber roof membrane the gutters have been slowly clogging up for a while.

IMG_4488.jpeg

Now here is the head scratcher - it also blew the rear wall out.

IMG_4482.jpeg

The rear wall was built of structural clay blocks with brick facade like the rest of the building however the roof system stayed intact being held in place by the rubber roof. The mortar between the clay blocks was very deteriorated.

Best thing we can figure is when the front section of the roof collapsed it sent a wave across the roof being wood framed and blew the back wall out.

Kicker is the GC installed the new glass store front and roll up door a couple of years ago. I guess that's what insurance is for.

IMG_4635.jpeg


The rest of the building appeared to be good shape. The GC is going to get a structural engineer to go over the remaining building and come up with a repair plan. We will have no work on this project as the front wall needs to come down manually with guys on a lift parked in the street. The rear needs to be shored up and the wall re-built. This was one of those relationship calls that doesn't pay that day but is an investment in the future.:)
 

willie59

Administrator
Joined
Dec 21, 2008
Messages
13,392
Location
Knoxville TN
Occupation
Service Manager
Never underestimate the power and weight of water. Clogged drains and scuppers can do serious damage on flat roof structures. On a side note, I spotted a sign for US Hwy 11, runs right through my town as well.
 

CM1995

Administrator
Joined
Jan 21, 2007
Messages
13,350
Location
Alabama
Occupation
Running what I brung and taking what I win
Never underestimate the power and weight of water. Clogged drains and scuppers can do serious damage on flat roof structures. On a side note, I spotted a sign for US Hwy 11, runs right through my town as well.

US HWY 11 is also 1st Ave N in the 'ham. :)
 

willie59

Administrator
Joined
Dec 21, 2008
Messages
13,392
Location
Knoxville TN
Occupation
Service Manager
US HWY 11 is also 1st Ave N in the 'ham. :)

Before the advent of interstate highways, US Hwy 11 was for points south, Chattanooga and beyond. Only other route south was US 411 which was more directly to Atlanta. To hit the east coast routes required crossing the mountains first.
 

CM1995

Administrator
Joined
Jan 21, 2007
Messages
13,350
Location
Alabama
Occupation
Running what I brung and taking what I win
Back to the retention pond from hell, what grass seed did you use that sprouted and grew that quickly at that head wall?

LOL - something I bought at HD on the way to the job. Whatever was cheapest. :D

Hydroseeder is coming tomorrow and they'll spray an ALDOT summer mix.
 

CM1995

Administrator
Joined
Jan 21, 2007
Messages
13,350
Location
Alabama
Occupation
Running what I brung and taking what I win
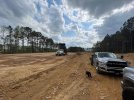
We are big dog people in our company and have the fortunate opportunity to bring them with us to work on most of our jobs.

IMG_4576 (2).jpeg

This now not so little fella showed up whining as a pup next door from our equipment yard on the concrete forming company's lot. One of our guys took him home and the rest is history. Fast forward a year and Dipstick has turned into quite the gentleman.

IMG_4603.jpeg

Lucy knows her serial numbers which has made her a favorite at the Cat parts counter. I think the biggest disappointment in her life was when she found out that she could not order an actual cat, at the Cat house.

IMG_4573 (2).jpeg
 
Last edited:

CM1995

Administrator
Joined
Jan 21, 2007
Messages
13,350
Location
Alabama
Occupation
Running what I brung and taking what I win
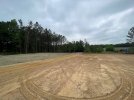
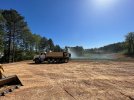
Wrapping up the wet job spraying the muck disposal area.

A little hydro-seeding from our erosion control sub. Nice T800 6x6.

IMG_4654.jpeg

Shot back towards the entrance with swale grassed.

IMG_4704.jpeg

Retention pond finished up the best we could. Not the best as far as finish work but considering there is pudding in and around 70% of it - not too bad.

The water is all ground water coming in from above and below the pond.

IMG_4718.jpeg

Upper swale. All the wet areas are ground water leaching in. Clear water currently runs in the bottom of the ditch. My best guess is it might dry up in Sept/Oct.

IMG_4726.jpeg
 
Last edited:
CM1995

Administrator
Joined
Jan 21, 2007
Messages
13,350
Location
Alabama
Occupation
Running what I brung and taking what I win
This crossing was "design build". 43' of 18" CL III RCP for access across the drainage swale. We had 2 joints left over from the ret. pond due to our supplier sending more than needed and picked up 3 more joints of previously used pipe plus a cut at our storage yard. Turned out nice and gives the owner access to the other 1/2 of their property.

IMG_4709.jpeg

Crossing looking back towards the building pad.

IMG_4712.jpeg

Overall shot of the muck area towards the pond. Don't mind the thumb.. :p


IMG_4716.jpeg

Ground water in the borrow pit area.

IMG_4725.jpeg
 
Top