• Thank you for visiting HeavyEquipmentForums.com! Our objective is to provide industry professionals a place to gather to exchange questions, answers and ideas. We welcome you to register using the "Register" icon at the top of the page. We'd appreciate any help you can offer in spreading the word of our new site. The more members that join, the bigger resource for all to enjoy. Thank you!

Advice for my first big job

OldandWorn

Senior Member
Joined
Nov 12, 2009
Messages
908
Location
Md/Pa
O&W
Hey I have a couple of questions....
I have a JD straight 310 and I see you replaced the seat tracks, seems this helped you out...what exactly did it do, tighten up the seat from rocking etc?

Also, I have the older parking brake that you speak of, being engaged by the shifter/transmission.
Any advice on how you went about engaging/disengaging on your hills.
Thanks,
Outback


I had 2 different problems with my seat. When I first bought the machine the slide rails were tight and worked well. The large pin in the center that the seat swivels on however had a lot of slop in it. I turned the pin down and bored the hole larger which enabled me to place a 1/8" wall thickness bushing in there.

Right as I was starting down the hill with the trench I lost most of the balls in the slide rails. I think there were a few left in the center which made it feel like a rocking chair. I had to stand up and fight with it when I wanted to swivel. The new rails were a bit pricy at $130 for the pair but I didn't have the time to go looking for something else that would fit.

I was thinking that it would be difficult getting the machine out of park on the hill. Some thoughts were to rock the front bucket or pull with the hoe to take pressure off of the mechanism. I didn't have to do either and it always came out without the feeling that I was damaging or bending anything. Placing it back in park is easy but I have good brakes on my machine. If it didn't want to go back in I just drifted an inch or so till it caught.
 

MountainGeek

Member
Joined
Sep 13, 2012
Messages
6
Location
West Virginia
How's it going overall on the project? You mentioned that you were kinda losing steam but getting close to the end....you think you'll be ready to make the final sprint in the spring?
 

OldandWorn

Senior Member
Joined
Nov 12, 2009
Messages
908
Location
Md/Pa
How's it going overall on the project? You mentioned that you were kinda losing steam but getting close to the end....you think you'll be ready to make the final sprint in the spring?


It depends on the weather. I prefer doing grunt work in cooler temperatures so as long as the ground isn’t frozen and it stays fairly dry I’ll keep chugging along. As you know, last winter was very mild but I didn’t get much done because of rain late in most weeks or on the weekends. After much thought, I have decided to stick to the original design and go in front of the barn and just be happy with 2 transformers and 2 electric meters.

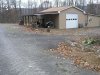
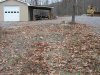
In these pics from a previous post you can see that I’m right up to the gravel with the power conduit and I only have to go a short distance to the transformer pad with the pink marker. I would kinda like to use the 12” bucket here for less damage and it’s on the machine right now but I sure like a 24” wide trench to work in. Another minor problem is the end of the power conduit is buried deep in silt from a big downpour last winter so I need to search for it carefully. I stopped the phone conduit (12” trench here) right after those 2 trees in the second pic of post #250 because I was unsure of my route and possibly needed to sweep towards the rear of the barn, abandoning some of the power conduit already in the ground. So I can now continue the phone conduit and finish filling in the trench up to where the power conduit ends. I also have to dig from the transformer pad to the barn where the meter will be installed. Install the meter pan, install the electrical panel inside, call for an inspection, and then the power company will come out and pull their wires. Oh, I also have to build the pads for another junction box and the transformer.

PB130012.jpg


PB130022.jpg
 
Last edited:

oceanobob

Senior Member
Joined
Jun 13, 2010
Messages
789
Location
oceano california
Occupation
general contractor
1. Pull Box: The pull box looks good, there will be no rusting with that one and hopefully no wasp/hornet/bee nest in that due to the gasket and seal.
2. Squeak: Glad that annoyance is quiet (for the moment)
3. Motivation: One needs to examine if the newness of a process provides the impetus & excitement for a project and then once the knowledge & confidence is gained, the mind relaxes since one "has it figured". These factors affect how one plans the time and attendance necessary to complete the job.
One can avoid this by treating jobs like mowing the lawn: you've done it before, you know how long it takes and what it looks like when it is done. But one is able to do it without the need for the "new".
4. Conduit Groping: Put the bucket all the way out so the teeth are not able to poke into the underground expensive item, they would sort of hopefully just slide over it, lift the front loader bucket off the ground a few inches, and for the ultimate in feel, pick up the stabilizers so they just hover on top the grass....in this situation, the downforce on the backhoe is minimum and if the bucket strikes/bumps the conduit, it will sometimes (mostly) just ride over it since the fulcrum is on those spongy rear tires and not the lip of the loader bucket...this arrangement is solely for those smoothy operators that can clean a bug off a windshield with the hoe (surely you know operators like that?)....but seriously, this works but! you got to use your fingertips on the controls and go real slow and feel the weight moving around, no sudden motions 'cuz if you get it to jump, it will indeed eat that expensive underground item...recommend you put the machine on flat ground and play around to drag a 2x4 block and you will know if you are ready. Good Luck. I always find pipes and conduits when I take 'one more pass'.
 

MountainGeek

Member
Joined
Sep 13, 2012
Messages
6
Location
West Virginia
Looking good, sounds like you are really close now.

1) If you need a little incentive to finish -- get it done before the electric company changes the specs on you for the transformer pads. My elec co got bought out mid-project, and I ended up having to redo 7! pads (including 4 that weren't even on my property).

2) I've run into the silt buried conduit before, as oceanobob says, curl the bucket in so the teeth are parallel to the ground and not tearing into the pipe. Also once I know generally where the end is, I will overdig a bit right past the end of the pipe, this makes it easier to chip the dirt away from around the pipe with a shovel by rolling it into the overdug area rather than lifting it out. If I know I'm going to leave a pipe end sitting for a while, I'll use the same trick, dig about a foot or so deeper right where the end of the pipe will be so even when some silt washes in the pipe is still sticking out in the air. When in doubt use a shovel.....every time I try to get too fancy I end up cracking the pipe and having to fix it. NOT worth the time. You might be able to get away with touching the pipe with the bucket on Sch40, but since you're running DB60 (which I'm using as well) I'd give it a wide berth. The thin wall DB60 will crack just from having a small rock drop in from the top of the trench.
 

OldandWorn

Senior Member
Joined
Nov 12, 2009
Messages
908
Location
Md/Pa
1. Pull Box: The pull box looks good, there will be no rusting with that one and hopefully no wasp/hornet/bee nest in that due to the gasket and seal.
2. Squeak: Glad that annoyance is quiet (for the moment)
3. Motivation: One needs to examine if the newness of a process provides the impetus & excitement for a project and then once the knowledge & confidence is gained, the mind relaxes since one "has it figured". These factors affect how one plans the time and attendance necessary to complete the job.
One can avoid this by treating jobs like mowing the lawn: you've done it before, you know how long it takes and what it looks like when it is done. But one is able to do it without the need for the "new".
4. Conduit Groping: Put the bucket all the way out so the teeth are not able to poke into the underground expensive item, they would sort of hopefully just slide over it, lift the front loader bucket off the ground a few inches, and for the ultimate in feel, pick up the stabilizers so they just hover on top the grass....in this situation, the downforce on the backhoe is minimum and if the bucket strikes/bumps the conduit, it will sometimes (mostly) just ride over it since the fulcrum is on those spongy rear tires and not the lip of the loader bucket...this arrangement is solely for those smoothy operators that can clean a bug off a windshield with the hoe (surely you know operators like that?)....but seriously, this works but! you got to use your fingertips on the controls and go real slow and feel the weight moving around, no sudden motions 'cuz if you get it to jump, it will indeed eat that expensive underground item...recommend you put the machine on flat ground and play around to drag a 2x4 block and you will know if you are ready. Good Luck. I always find pipes and conduits when I take 'one more pass'.

Thank you, great info as always Bob :thumbsup
 

OldandWorn

Senior Member
Joined
Nov 12, 2009
Messages
908
Location
Md/Pa
Looking good, sounds like you are really close now.

1) If you need a little incentive to finish -- get it done before the electric company changes the specs on you for the transformer pads. My elec co got bought out mid-project, and I ended up having to redo 7! pads (including 4 that weren't even on my property).

2) I've run into the silt buried conduit before, as oceanobob says, curl the bucket in so the teeth are parallel to the ground and not tearing into the pipe. Also once I know generally where the end is, I will overdig a bit right past the end of the pipe, this makes it easier to chip the dirt away from around the pipe with a shovel by rolling it into the overdug area rather than lifting it out. If I know I'm going to leave a pipe end sitting for a while, I'll use the same trick, dig about a foot or so deeper right where the end of the pipe will be so even when some silt washes in the pipe is still sticking out in the air. When in doubt use a shovel.....every time I try to get too fancy I end up cracking the pipe and having to fix it. NOT worth the time. You might be able to get away with touching the pipe with the bucket on Sch40, but since you're running DB60 (which I'm using as well) I'd give it a wide berth. The thin wall DB60 will crack just from having a small rock drop in from the top of the trench.


First Energy? They also merged with Allegheny Power a week before I put my request in. Maybe I should check in with the engineer and make sure all is still well. Seven pads for 1300'.....difficult pulls?

Yeah, I was going to stick a sweep on the end of the conduit but the storm came during the week that I made the decision to stop here and start on my neighbors property. :Banghead

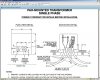
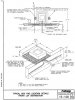
Is your new pad configuration similar to this?

Pads.jpg
 

MountainGeek

Member
Joined
Sep 13, 2012
Messages
6
Location
West Virginia
Yup First Energy is the new company for me as well.

It looks like your diagram shows the "old" method. Concrete pad with a cutout in the middle, sitting on top of a gravel base. That's how I originally designed mine. After they became First Energy, the specs changed to use a plastic box that you bury 12" with 3" sticking above the ground, and the transformer sits on top of that. If you're lucky maybe they will let you use the old method.

In my case, they absolutely would not pull cable unless I met the new specs. I had to redo all 7 pads...dig out the existing gravel pad, dig down 15", put in 3" of gravel, then set the box on top of that. At least they gave me the boxes for free, but man was it a PITA and I REALLY hate re-work. And a lot of the pads had 4-5 pipes coming in, had to dig a good bit by hand to avoid breaking them.


12-18-2012 03-49-30.jpg
 

MountainGeek

Member
Joined
Sep 13, 2012
Messages
6
Location
West Virginia
Oh, re your question about the number of pads:

I only have 3 pads for my 1300ft. However, the power actually stops another 1000 feet away along my right of way through a failed subdivision (a casualty of the real estate bubble). They never pulled the power cables through half of the the subdivision since there are no houses needing service. The other 4 pad locations are in the subdivision along my ROW feeding future homesites. Naturally the developer is bankrupt and no one else wanted any part of it...so if I wanted power I was going to have to fix it on my own.
 

OldandWorn

Senior Member
Joined
Nov 12, 2009
Messages
908
Location
Md/Pa
That sux but I'm sure I would have done the same. Like you said, who else is going to do it. I guess I had better double check on this, maybe reserve a couple of concrete pads if they are getting low. :rolleyes:
 

outbackrider

Well-Known Member
Joined
Apr 28, 2012
Messages
77
Location
CT
I had 2 different problems with my seat. When I first bought the machine the slide rails were tight and worked well. The large pin in the center that the seat swivels on however had a lot of slop in it. I turned the pin down and bored the hole larger which enabled me to place a 1/8" wall thickness bushing in there.

Right as I was starting down the hill with the trench I lost most of the balls in the slide rails. I think there were a few left in the center which made it feel like a rocking chair. I had to stand up and fight with it when I wanted to swivel. The new rails were a bit pricy at $130 for the pair but I didn't have the time to go looking for something else that would fit.

I was thinking that it would be difficult getting the machine out of park on the hill. Some thoughts were to rock the front bucket or pull with the hoe to take pressure off of the mechanism. I didn't have to do either and it always came out without the feeling that I was damaging or bending anything. Placing it back in park is easy but I have good brakes on my machine. If it didn't want to go back in I just drifted an inch or so till it caught.

Thanks for the info...
 

OldandWorn

Senior Member
Joined
Nov 12, 2009
Messages
908
Location
Md/Pa
It's either been raining or snowing so no more digging for now. I went down and checked on my pipe and noticed a brown stain in the bottom which was difficult to rub off with my finger. Iron maybe?? Judging from the brown stripes higher up in the pipe the flow got pretty substantial for short periods of time.

P1050006.jpg


P1050004.jpg
 

drivadesl

Member
Joined
May 12, 2010
Messages
8
Location
Orange Cty. NY
Occupation
Engineer
O&W! What a great thread. Took me about a week to read it all, but very impressive job and my hats off to you for sticking with it over such a long period. Really takes both mental and physical energy to keep big jobs like this moving forward. You should be proud.

Now one question. Any idea of the number of hours that you added to the old Case since the start of this job?
 

OldandWorn

Senior Member
Joined
Nov 12, 2009
Messages
908
Location
Md/Pa
Thanks and welcome to HEF drivadesl, this is an outstanding forum. Yeah, after the excitement of learning something new went away it was hard to keep motivated.

I glanced at the hour meter on the John Deere while backfilled the hill and I think it was about 125 hours higher than from the start of the project but I need to double check that. It seems like most of the time has been on the ground laying and bedding the pipe.
 

drivadesl

Member
Joined
May 12, 2010
Messages
8
Location
Orange Cty. NY
Occupation
Engineer
Thanks for the welcome. I've been one of the lurking members and enjoy reading up on all this stuff. Sorry I typed Case, but meant Deere, must be that age thing creeping up.....

Looking forward to when you can continue with the project and this thread. Any estimates to completion?
 

OldandWorn

Senior Member
Joined
Nov 12, 2009
Messages
908
Location
Md/Pa
Thanks for the welcome. I've been one of the lurking members and enjoy reading up on all this stuff. Sorry I typed Case, but meant Deere, must be that age thing creeping up.....

Looking forward to when you can continue with the project and this thread. Any estimates to completion?

I'm hoping to have the utility out early or mid summer when my neighbors land is dry.
 

Ando

Well-Known Member
Joined
Nov 15, 2009
Messages
192
Location
Australia
Occupation
Proprietor - 5 Star Contract Services
Good to see the threads still alive O&W.

Maybe you'll have to change the title to "advice for those starting their first big job":D
 

OldandWorn

Senior Member
Joined
Nov 12, 2009
Messages
908
Location
Md/Pa
Thanks for checking in Ando. With my luck there will be some big break through in laser power distribution right as I finish and wires will become obsolete.:crying
 

Ando

Well-Known Member
Joined
Nov 15, 2009
Messages
192
Location
Australia
Occupation
Proprietor - 5 Star Contract Services
Haha....well, I did see a science show on TV recently, that had an article on wireless power distribution (through the ground)
Although I suspect you and I may not be around to use it.
 
Top