• Thank you for visiting HeavyEquipmentForums.com! Our objective is to provide industry professionals a place to gather to exchange questions, answers and ideas. We welcome you to register using the "Register" icon at the top of the page. We'd appreciate any help you can offer in spreading the word of our new site. The more members that join, the bigger resource for all to enjoy. Thank you!

Cat 215, some questions

a65l

Well-Known Member
Joined
Mar 24, 2023
Messages
63
Location
virginia
Issues, issues. Turns out the replacment idler assembly isn't an exact replacement. I've looked at the offereings from AMS and Pivot, and both of the drawings they supplied of the part don't match what I have. Specifically, idler width is larger, bolt holes don't match... not good. On a plus note, I did manage to disassemble the idler from the yoke today. Surprisingly, 5 out of 6 bolts just backed right on out no issues.. last one... seems the channel it passes thru is larger in diameter than the bolt, and it got packed with grit. I cleaned a bunch of it out and thyen had to back and forth with the impact to get it to come out. But none of them have corrosion on the threads, and all the bolts look to be in good condition. Another surprise was that the inside of the idler itself isn't wallered out. The axle broke in 2 places, apparently b/c the bearing siezed up, and the wallering occured on the side plates. I -should- be able, if I can remove the axle halfs stuck in the side plates, to replace the bearings in the idler and install a new shaft. Of course, if I can source those parts, anyway. Might be able to find a roller with new bearings. Who knows. More phone calls tomorrow.

Pics.

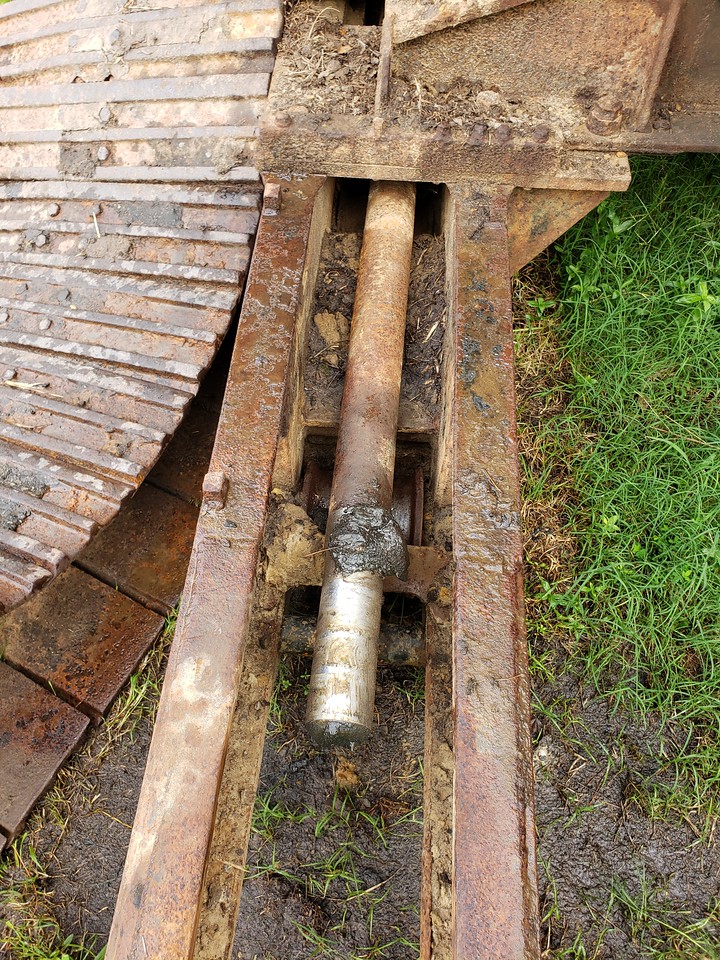
20230717_173945-X2.jpg


Chromed part of the piston looks pretty good. I need to hit it all with the pressure washer.

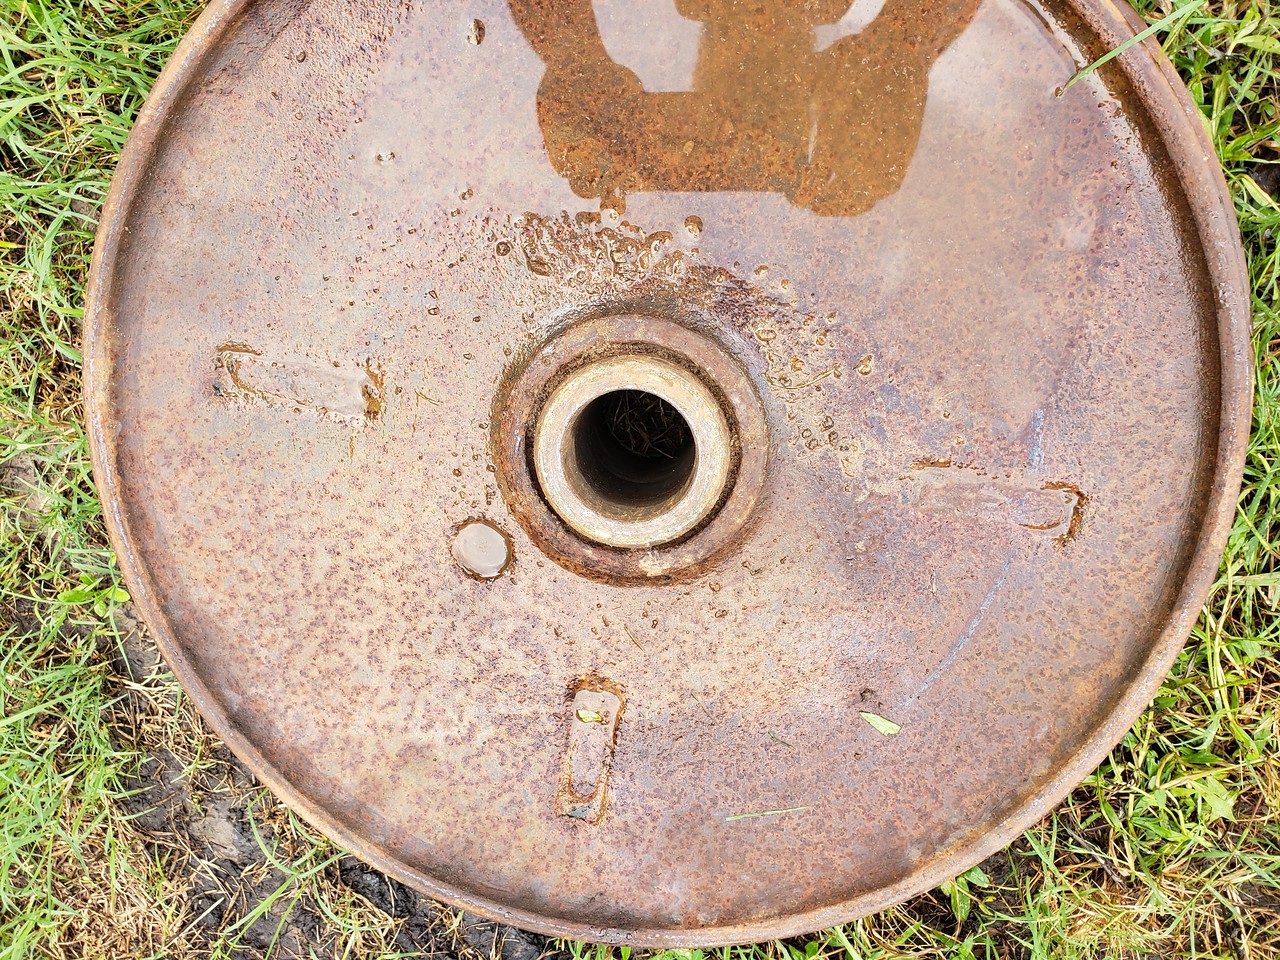
20230717_173929-X2.jpg


Idler looks ok. No, the inner shaft does not turn. But, it also doesn't look like the shaft wore a bunch of material out of the inner bore. Haven't measured, but it should be just over 2" in diameter.

20230717_173916-X2.jpg


The hardware looks ok. Not like it needs to be super tight, just has to hold the side plates to the yoke. The whole assembly, I would imagine, is under tension when the track is tight.. or as tight as one can get it...

20230717_173859-X2.jpg


The pin, at least the part that's not stuck in the sideplates. It appears to be missing some length, as well.. probablly rubbed off over the years.

20230717_173908-X2.jpg


Where all the wallerin was going on. There's another piece inside the sideplatge that retains the axle, that's currently soaking in some Liquid wrench. I need to pick up a larger punch to try and tap it out, then work on the axle. Hopefully it all separates. Worst case is I stick the idler in and let the frame retain the axle. It won't be perfect but it will be good enough for what I'm going to do.

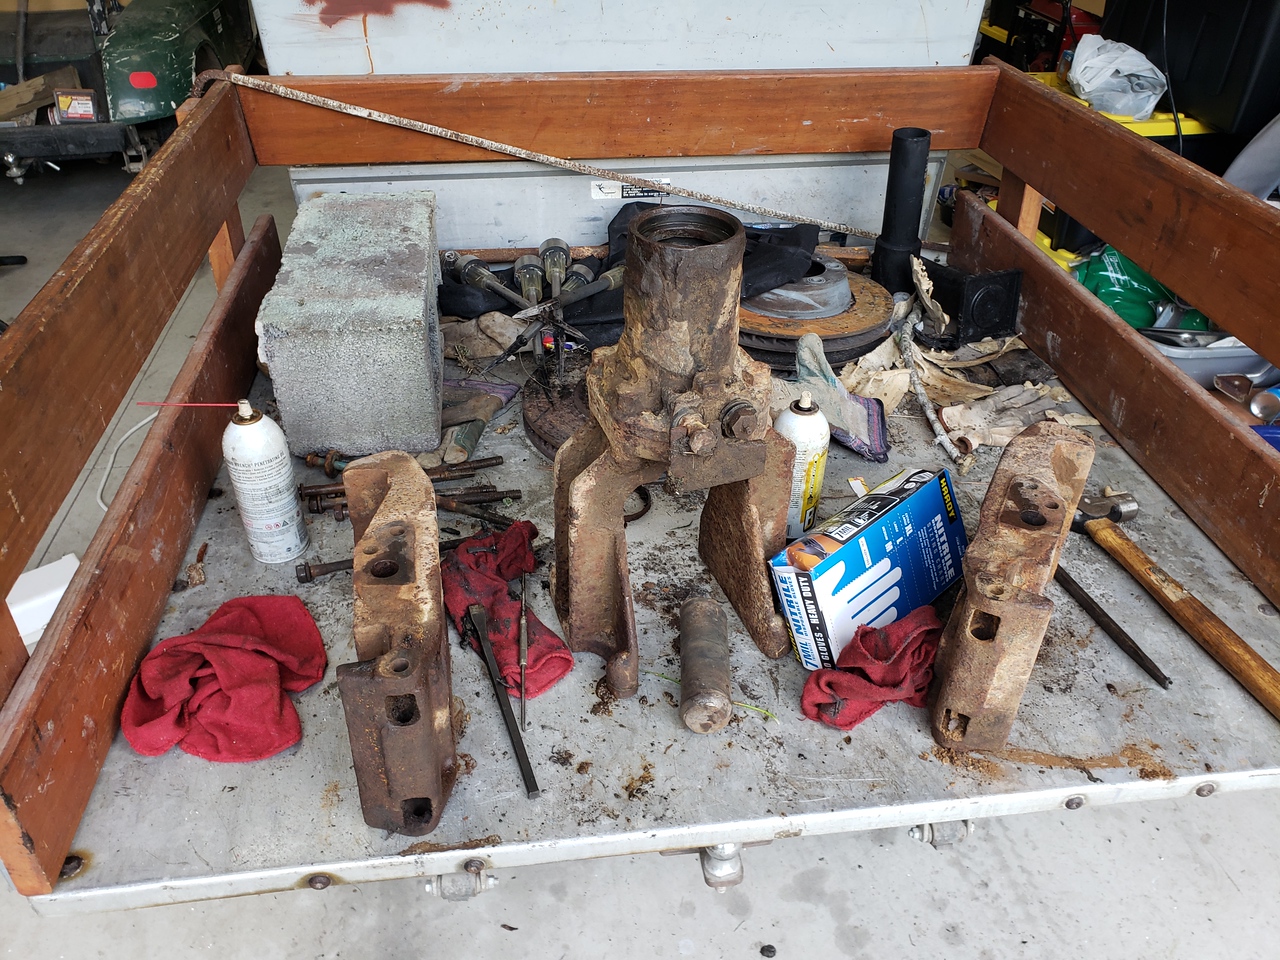
20230717_173856-X2.jpg


The whole mess on the back of the cart. Guess which side had the stuck bolt? On a plus note, I can clean up the adjuster cylinder, re-pack it and reinstall it without having the idler, so I can do something while I'm figuring out what I'm going to do...
 

a65l

Well-Known Member
Joined
Mar 24, 2023
Messages
63
Location
virginia
Ok. I'm very confused. I'm certain there's supposed to be a bearing in the front idlers, but where the hell is it? The "bearing", by part number, is actually the side plate, which appears to have some sort of bearing in it, but it can't rotate, as the axle shaft is located by locks in the"bearings", or side plates. The idler itself looks to have some sort of bearing assembly installed, but nothign shows on the parts breakdowns, and the disassembly instructions for the idler itself refer to "bearings", but the parts it indicates, on the parts breakdown, come back as "seals". Now, it appears to me that the idler is supposed to contain a quantity of lubricant, I don't see the plug to fill it but I haven't really looked ery hard yet, which would tell me that the bearings are in the idler. I'm trying to order parts, as I've had no luck with a complete idler assembly from anywhere. I can get the shaft, locks, seal parts, etc etc, but I must be missing something here...
 

a65l

Well-Known Member
Joined
Mar 24, 2023
Messages
63
Location
virginia
Ok. Been a while, but I've been distracted elsewhere.

So, front idlers are in work. Turns out there is a bushing in the idler, the idler is full of oil, that's what lubes the bushing on the axle shaft. There are seals that retain the oil, etc etc... lots of stuff going on there. I had to have the old bushings burnt out as I couldn't get on them with a press to remove. There is some damage to the idler wheel, but the damage involves structures that hold the seals. I think I can just stick the seals to the idlers with some sealant and that will be enough to hold the oil in. I got new outboard bearings, a new axle, new seals, washers, etc etc... I thought I had everything, until I went to put it together.

The bushings that go into the idler, I got 2 of them, because that's what it needs. One was in a CAT part box, the other one was in a CTP parts bag. The CAT part fits. I haven't installed it yet, but it's the right part. The CTP part... not so much.

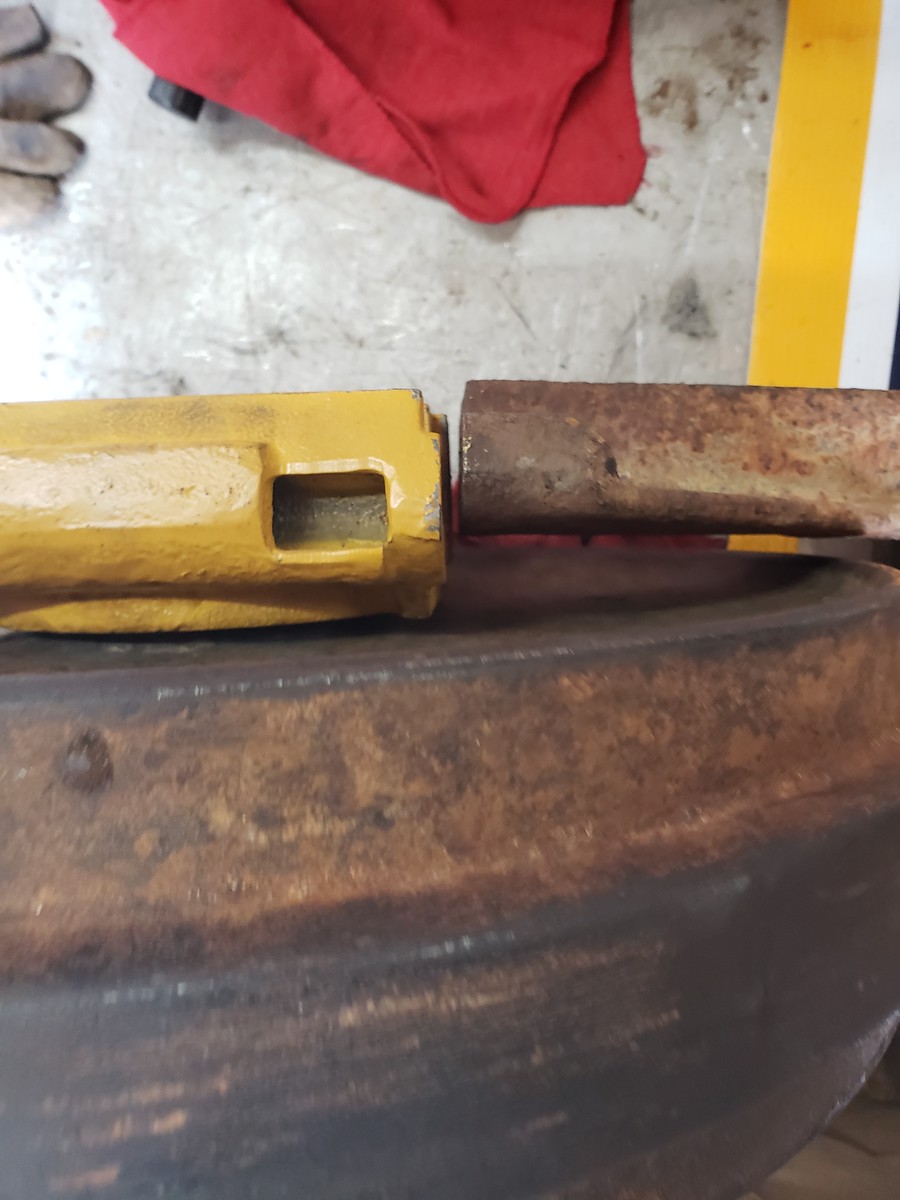
20230814_191724.jpg

CAT bushing on top, CTP on bottom. Note that the CTP bushing has a larger outside diameter. That's not gonna work. Contacted the vendor, he doesn't have another one to send me, and his supplier is out. Well ****. Now that I look closer, as well, I note that the CTP part isn't quite the same dimension lengthwise, and it lacks a brass facing washer that the CAT part has. I;ve verified that the CTP part is meant to be the correct replacement, but obviously someone dropped the ball here.

The best part is that I can't seem to find anyone with the CTP part in stock anymore.... I've ordered from 3 places and they all cancelled the order as they can't get it. CAT says their part number is discontinued... but I might get lucky and find one somewhere. I need to call them today and work that angle. It's an 3A4790 bushing, if anyone has one sitting around that they're willing to sell...

Otherwise, lots of new parts just waiting. I was kind of surprised that I got the oil fill plug to come out of the idler intact.. actually it was fairly easy. If I had known, I would have pulled the fill plug on the otehr idler while I had it out and topped it off.. but you can't fill it at the top with the idler in the machine.

20230724_135816.jpg

All kinds of shiny stuff... I've loosely assembled, and it looks liek there aren't going to be any more surprises.. fingers crossed.

 

Nige

Senior Member
Joined
Jun 22, 2011
Messages
38,739
Location
G..G..G..Granville.........!! Fetch your cloth.
There is some damage to the idler wheel, but the damage involves structures that hold the seals. I think I can just stick the seals to the idlers with some sealant and that will be enough to hold the oil in.
I don't think so. Here's an excellent guide to installing them from @willie59 If you think you can stick them in with sealant please let us know how it works out.
IMHO you'll need the idlers refurbished to rectify the ramp areas where the Toric Ring part of the seals are installed.


a65l

Well-Known Member
Joined
Mar 24, 2023
Messages
63
Location
virginia
Ah, schooling the ignorant.. wasn't aware those seals were that technical. The CAT manual install procedure is much simpler... pretty much one line. I figured there had to be some spring force to keep them together. There's really not much else I can do to seal up the center of the idler. And I'm not sure where I can get that idler refurbished... I guess worse case is I put a grease nipple in the fill hole and keep 'er topped up. Given that the bushings are hen's teeth, apparently, I'd rather not, but digging season is upon us and I'm running out of time for this year...
 

a65l

Well-Known Member
Joined
Mar 24, 2023
Messages
63
Location
virginia
Back in business! Now just have to worry about the seals, etc etc... but one more hurdle gone. Found this one on Amazon, Blumaq is the company, but I think it came from Florida parts zone or some such. Either way, other than the brass looking a little pale, it's the same part. Well, same dimensions, anyway.

20230920_150215-X2.jpg
 

a65l

Well-Known Member
Joined
Mar 24, 2023
Messages
63
Location
virginia
Bushings installed. No pics, as I was busy and my hands were dirty. The grooves for the duo-cone seals on the idler are trashed, and new idlers are few and far between. The bearing side is new, and the seal grooves are new so no issues there. So, I need to apply some pressure to the outer seals, but not too much, and I need the side bearings to be tight to the idler with minimal play. I wish I didn't have to half ass stuff like this, but without buying more new parts I can't find I have to.

So... my simple answer was to do some eyeballing, and I wound up grinding some off the back of the seals that are against the idler. I spent some time ensuring that I could feel some spring tension on the seal but not too much. After much adjusting I glued the inner duo-cone half to the idler with silicone sealant. Not perfect, but the best I can do given the circumstances. With it all together I filled the idler with oil and stood it up to see if it would keeep the oil in... and it did.

So now we come to installing the yoke assy. Apparently having the idler bang around loose didn't do it any favors, and with one side bearing bolted to it I got this on the other side:

20230924_123557-X3.jpg


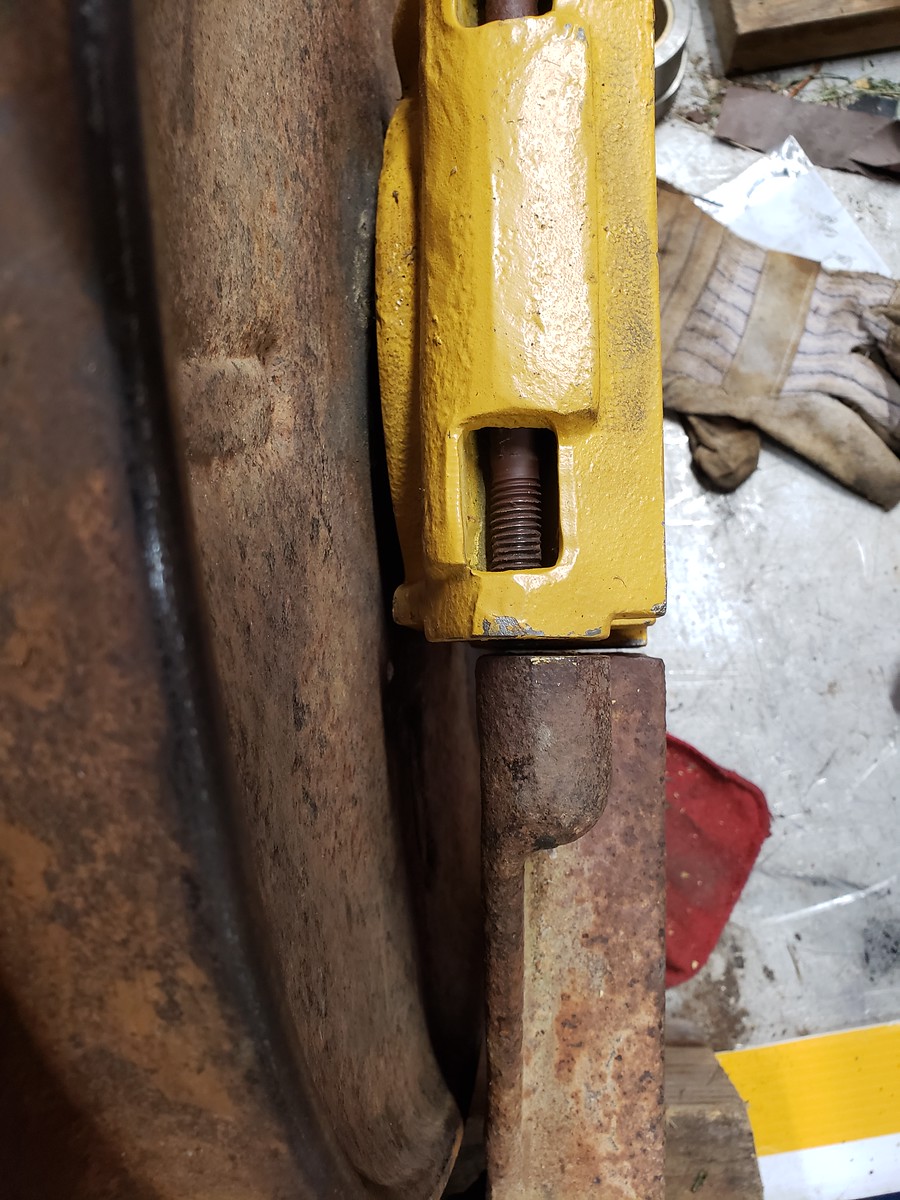
Yeah, that's a little bent. There's a couple things I can try here, but not having a torch or Hulk arms I obviously need to do some bending. I don't see any cracks so I assume this is a forging and not a casting, so I ought to be able to bend it back. I thought about toting it out to the yard and putting some pressure on it with another machine and then starting bolts, but don't like that. I'd rather it was aligned on it's own and not needing bolts to hold it inline. But I do have a 20 ton floor press... w onder if that's enough? Well, as it turns out, with a couple days of paitence and putting gradually more pressure on....

20230925_185146-X3.jpg


That's with the other side bolted and snug. I know it doesn't look all that much better but I managed to get the lower 2 bolts in without any effort, so I'm OK with mounting it up in the frame and using a big pry bar to get the top bolt in. It's off by just a sliver, so not bad at all, given that they were all off by more than 1/2 a hole at first.

Next step will be to get it back in the frame and get the track mounted.. it'll be a complete machine again. And I can move it and mow under where it's been sitting.
 

a65l

Well-Known Member
Joined
Mar 24, 2023
Messages
63
Location
virginia
Update... idler reinstalled, mostly, trying to get track mounted. Well, trying. Looks so easy on the youtubes... but all we've managed to do to date is get it entirely off the side frame. Busy getting ready for our annual fall thing, so no chance to really screw with it lately. But on a plus note, the engine starts right up...
 

a65l

Well-Known Member
Joined
Mar 24, 2023
Messages
63
Location
virginia
So, an update. Rainy season set in and it was a doozy, so no work on machine untill it dries up. Don't really want to turn the side yard into a swamp. I have a neighbor who has a hydraulic press setup, so we may be able to simply locate the master link and press it out, then mounting the track should be fairly easy. But... finding that master link... is it dimpled on both sides, or just one?
 

a65l

Well-Known Member
Joined
Mar 24, 2023
Messages
63
Location
virginia
Well, it's dry enough, just trying to get a schedule with one of my neighbors, who swears that he can just pop that track back on with his skid steer. HOpefully we'll get a chance at it this weekend, but will find out...

Oh, and as an aside, the idler is still holding oil... but we'll see when we get to walking and digging and flexing stuff up there...
 
Last edited:

a65l

Well-Known Member
Joined
Mar 24, 2023
Messages
63
Location
virginia
So... how about an update you say....

Well, after a year or so of dealing with other stuff I was able to turn attention back to the 215. A neighbor had a guy who was trying to start his own heavy equipment repair business, so I called him and we finally got together. With the help of another neighbor, a Kubota mini, a deer tractor, several chain falls and multiple chains, we got the track back on. So, mobile again.

But.

Still feels very down on power. It starts very easily, once the starter decides to turn, anyway, but when walking, or moving the boom, the engine bogs very badly. I did some test digging, and while it would lift a full bucket of dirt it wasn't happy. No smoke while it's bogging.
I have changed the fuel filter, and verified that the line is clear, so I'm sure we're getting quanties of fuel back to the pump. I need to check pressure in the fuel pump housing, it's on my to-do list but the yellow flies and the sun have other ideas. I have verified that I have fuel running back to the tank thru the bleed port, but not sure if it's too much. Another thing I need to verify is that I have the correct pump on the machine, I have some doubts because there is no shut-off detent, like the manual says, and I know the pump was replaced as an expedient to get the machine running so it could be moved.

I have also changed all the hyd. filters (3 of them).

I can't find any numbers or a plate on the fuel pump, I know there has to be one somewhere. I do see that the pump has a boss for a tach drive, which I don't see in the pictures in the shop manual.
 

a65l

Well-Known Member
Joined
Mar 24, 2023
Messages
63
Location
virginia
I think the easy fix is off the table... I put a pressure gauge on the pump housing, it's showing 30 psi at full throttle, but I can't see the gauge when I'm under load, so it might be dropping...
 
Top