• Thank you for visiting HeavyEquipmentForums.com! Our objective is to provide industry professionals a place to gather to exchange questions, answers and ideas. We welcome you to register using the "Register" icon at the top of the page. We'd appreciate any help you can offer in spreading the word of our new site. The more members that join, the bigger resource for all to enjoy. Thank you!

My CAT 426 Project

DMiller

Senior Member
Joined
Feb 21, 2010
Messages
16,620
Location
Hermann, Missouri
Occupation
Cheap "old" Geezer
As I recall, I used a pair of older Tinning Shears to cut this, better than scissors, smoother than razor blade or knives.
 

oarwhat

Senior Member
Joined
Dec 14, 2009
Messages
840
Location
buffalo,n.y.
We own a 1995 416B . Just a heads up the tie rod end that hooks up to the steering cylinder can freeze up and snap the tie rod. It's non greaseable and when the rubber boot comes off it rusts and seizes. In hindsight we should have caught this and kept it lubed. It broke during a snowstorm of course.
 

edgephoto

Senior Member
Joined
Aug 13, 2019
Messages
739
Location
Stafford, CT
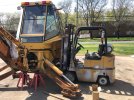
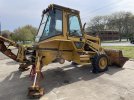
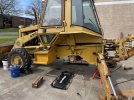
Finally had time to work on my 'hoe. I am tackling a leaking wheel seal. Since the axle has to come apart for this and the bearing needs to be replaced I will do both sides and replace the brake discs while in there.
This project is dragging on and I need this machine soon to start a house build.
IMG_2671.jpegIMG_2672.jpegIMG_2684.jpeg
 

edgephoto

Senior Member
Joined
Aug 13, 2019
Messages
739
Location
Stafford, CT
I'd put the chain further back on the fork when lifting that much weight. That fork looks like it's read to give up!
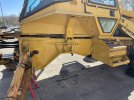
The fork extension does look bad. It really isn't. The extensions were given to my brother by a body shop up the street who used them to move cars around. He bent them. He has a much bigger forklift now.

I would put the chain further back but there is a hole in the spot so it was more secure. Besides I was not lifting it and carrying it around. Just using it to stand the axle up, which takes way less power.

Today I plan to take the top section of and start to teardown to get to the axle seal and bearing.
 

edgephoto

Senior Member
Joined
Aug 13, 2019
Messages
739
Location
Stafford, CT
Last week I was working on one side of the axle and I realized the brakes were worse than I thought so I ordered some additional parts. The bearing and seal were not that difficult. Got one hand completed yesterday and flipped it over and took apart of the other side.


IMG_2696.jpegIMG_2697.jpegIMG_2698.jpegIMG_2703.jpeg
 

edgephoto

Senior Member
Joined
Aug 13, 2019
Messages
739
Location
Stafford, CT
While apart I took the time to clean the dirt out of the frame on the right side and the oily dirt and debris from the left side. The left side axle seal was leaking pretty bad.

I used rust encapsulator on the rust and then painted it yellow so it looks better.

IMG_2704.jpegIMG_2706.jpeg


I finished the right side bearing and seal replacement today. This weekend I hope to get the axle installed.
 

edgephoto

Senior Member
Joined
Aug 13, 2019
Messages
739
Location
Stafford, CT
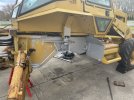
Had 5 hours today to do more work. Got the axle put together and installed in the machine. Got the brakes adjusted, then adjusted all the linkage. The brake linkage was whacked out. Took an hour or so to get it all dialed in. Next weekend I should get the wheels on and driving around. The left wheel seal was leaking so the inside of the rim is loaded with oily dirt. I need to scrape and clean that.

Anyone have tips on how to fill the axle?
Suction gun is out of the question. 4.5 gallons would take forever.
Thought of using a transmission funnel and pulling the floor plate and pouring it in.
Oil is in a pail and I was thinking maybe some kind of drill or electric pump?

IMG_4963.jpegIMG_4963.jpegIMG_2746.jpegIMG_2745.jpeg
 
Top