• Thank you for visiting HeavyEquipmentForums.com! Our objective is to provide industry professionals a place to gather to exchange questions, answers and ideas. We welcome you to register using the "Register" icon at the top of the page. We'd appreciate any help you can offer in spreading the word of our new site. The more members that join, the bigger resource for all to enjoy. Thank you!

Replacement bushings have the wrong groove pattern for grease to flow

crazydane

Well-Known Member
Joined
Jun 3, 2021
Messages
64
Location
Afton, Virginia
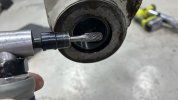
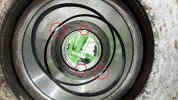
I'm in the process of fixing up my Takeuchi TB260 and am replacing the main bucket pin and bushings. I got the new oem bushings in yesterday and toss them in the fridge overnight without inspecting them first. Knocked them in this morning and then noticed the grooves that allow grease to flow, don't match the originals.

My dipper arm has a single grease nibble in the center that then pushes grease out into the bushings to keep the pins greased. Here you can see the grease grooves in the old bushings extending out past the edge:
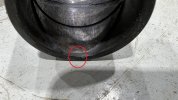
IMG_6034.JPEG

In the new bushings however, the grooves stop short of the outer edges:
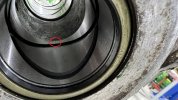
IMG_6033.JPEG

Instead, they have center grease hole:
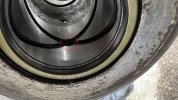
IMG_6035.JPEG

Should I just not worry about and once I get some wear in the new pin and bushings, expect that to then allow the grease to flow, or should I extend the grooves in the new bushings past the inside edge so that grease can flow into the grooves?

These are oem bushings ordered from a Takeuchi reseller, so I'm not sure if they send me the wrong ones, or the design just changed over years. My TB260 is 2018 model, so not that old.
 

Coaldust

Senior Member
Joined
May 9, 2011
Messages
3,354
Location
North of the 60
Occupation
Cargo Tanks, ULSD, RUG, Methanol, LPG
That’s groovy, man.

Very awesome you are putting new life in the ol’e Takeuchi.
 

csthompson12

Well-Known Member
Joined
Nov 25, 2010
Messages
208
Location
usa
How many hours on your 260? I have a little over 2,200 on mine, very little play in any of the pins.
 

Jonas302

Senior Member
Joined
Jan 4, 2015
Messages
1,198
Location
mn
Should work nice that way

Just as a note when I replaced bushings on 320 cat also a center greasing cavity the bushings are just dimpled no groves and grease still pushes though and to the outside
 

crazydane

Well-Known Member
Joined
Jun 3, 2021
Messages
64
Location
Afton, Virginia
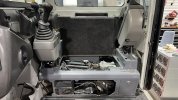
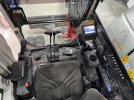
Mine has a little under 2,400 hours on it. Been going through it thoroughly and cleaning everything. Even took out the seat to clean everything inside the cab. Not only was there a layer of dust everywhere, but also nasty grease and what not. Turned out pretty nice.

IMG_6052.JPEG

IMG_5862.JPEG

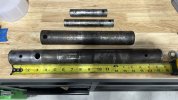
Replacing both bucket pins as well as the thumb pins as all are quite worn:

IMG_5883.JPEG

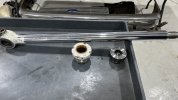
Took bucket rod to get re-chromed as it had a lot of scratches in it and a pretty deep nick:

IMG_5980.JPEG

Seal was leaking, so replacing that as well.
 

crazydane

Well-Known Member
Joined
Jun 3, 2021
Messages
64
Location
Afton, Virginia
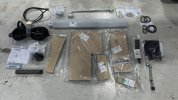
Got my first of new parts in:

IMG_6029.JPEG

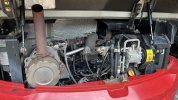
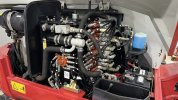
Engine and hydraulics areas cleaned up nicely:

IMG_5794.JPEG


IMG_5795.JPEG

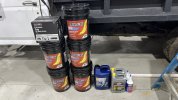
Replacing all fluids and filters as well:

IMG_6065.jpeg

After doing some research, I believe that Traveller Anti Wear Premium ISO 46 will be ok and also Lucas Oil 80W-90 gear oil for the final drives. Was trying to get some CAT TODO-50 / TO-4, but not get it in less than a 5 gallon bucket and I need less than a quart per side.
 

tantoy

Well-Known Member
Joined
Jul 13, 2012
Messages
50
Location
Tacoma, Wa
I have a tb135 and am always impressed with its reliability, feels good to keep up with things like your doing, nice work!
 

crazydane

Well-Known Member
Joined
Jun 3, 2021
Messages
64
Location
Afton, Virginia
Yeah, the thickness of the metal everywhere on this machine is pretty impressive. They did not cheap out anywhere from what I can tell. Spoke to the hydraulic shop and got a quote for $400 to strip, polish and re-chrome the rod. Still less expensive that a new one ($650 plus shipping), so I told them to go ahead.

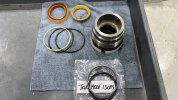
New bucket cylinder seal kit came in, so I got those installed. The pieces are on the left.

IMG_6067.JPEG

There were 2 extra pieces (on top of the plastic), that are not used. I think the grey one might be for the piston, but I don't plan to replace it since it looks fine.

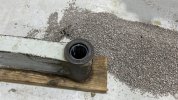
Also got the bushings pressed into the link (after grinding grooves into those as well:

IMG_6070.JPEG

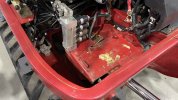
Cleaning up the battery "tray" area as well and will sand it down and prime/repaint before rust gets a chance to take hold:

IMG_6071.JPEG

I'll pay special attention the where the grounds all connect, as that area looks particularly bad.
 
Top